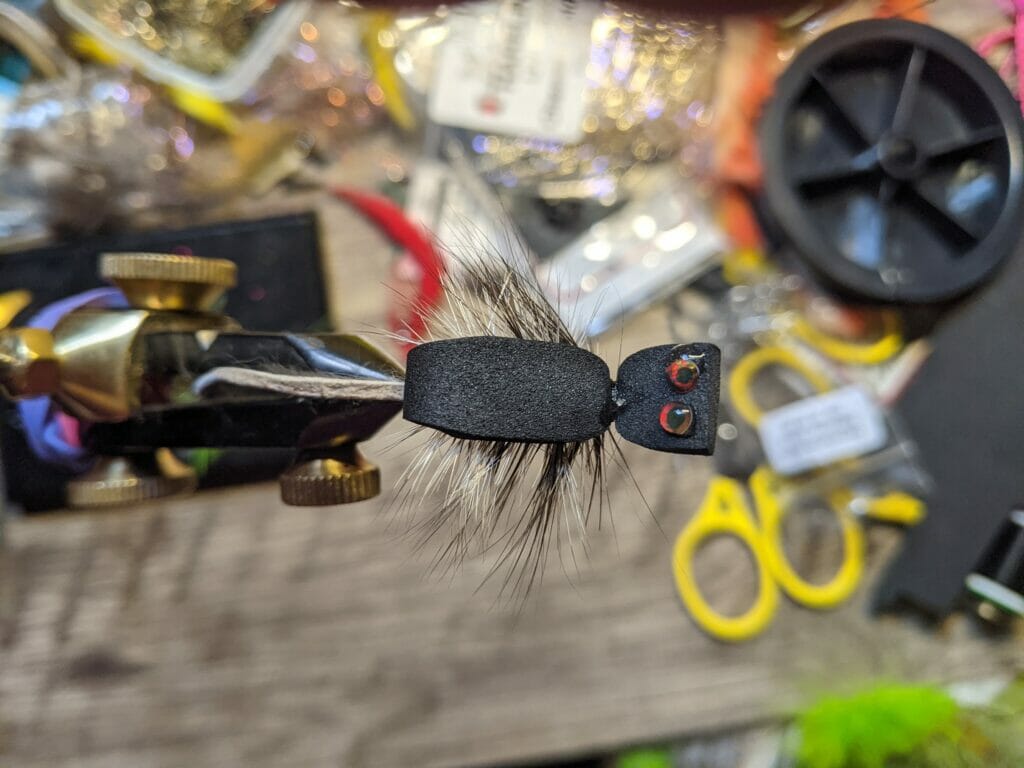

A quick-and-easy adaptation of the Morrish Mouse. All photos by Chris Hunt.
I’m headed down to Chilean Patagonia early next month — I’ll leave the chill of Idaho’s autumn for spring in the Southern Hemisphere, all for some trout fishing based out of Magic Waters Lodge.
I asked my long-time fishing buddies what flies I should be tying for this sure-to-be-epic adventure in the Andes, and I got back a single-word reply from one of them: “Mice.”
Mice? I don’t tie too many mice here, although I imagine the big browns and rainbows of the lower Henry’s Fork are mouse-eaters, and, some years ago, while cleaning a big rainbow from the South Fork of the Snake, I was surprised to find a small mouse in the fish’s belly. But my home rivers aren’t known as mousey destinations, I guess — last week, while floating the river, I asked the guide on the oars if he ever fished mice. He just shook his head.
But, in the glacial-chilled rivers and streams along spine of the Andes in southern Chile, the trout do, or so I’m told, eat mice.
So I headed to the vise and, with just over a week before I head out, I started my research. I needed a mouse pattern that I could tie quickly and dependably. And, if I didn’t have to work with difficult material, even better.
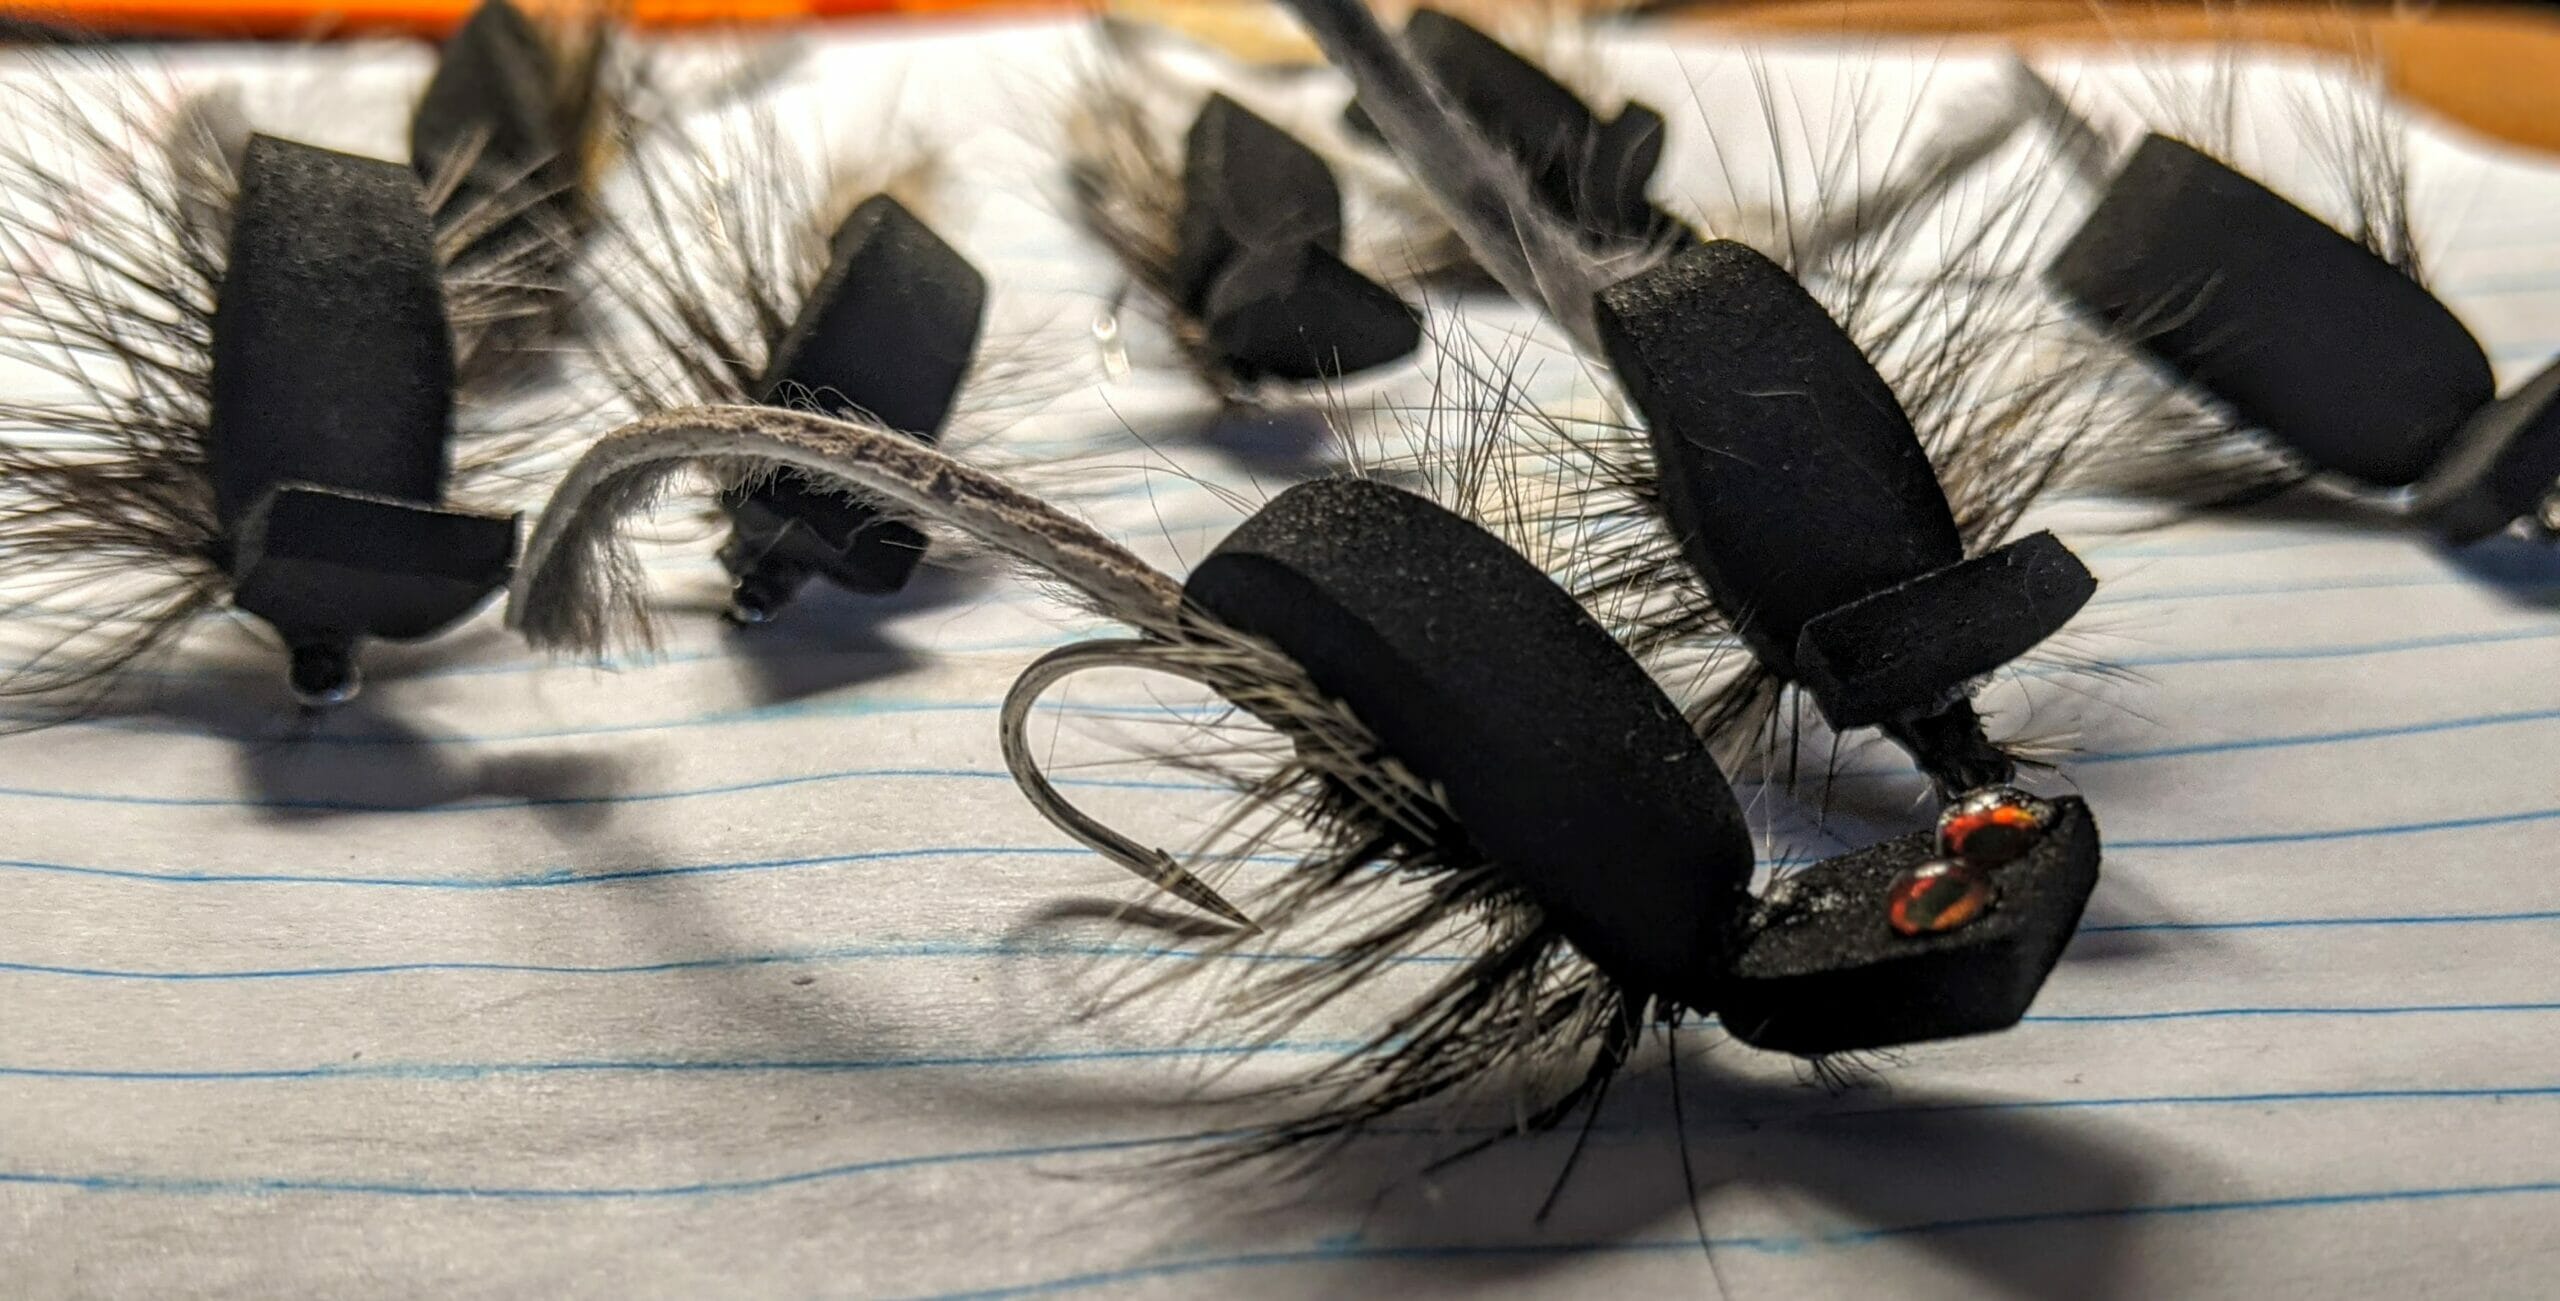
My solution? An adaptation of the Morrish Mouse, a long-time favorite of anglers across the globe who case big trout in places like New Zealand and southwest Alaska.
Here’s what you’ll need:
- Gamakatsu SS15 size 1 hook. I tied the Morrish Mouse in three sizes, but this is the one that was easiest to handle.
- Black craft foam—at least one full sheet.
- Grizzly saddle hackle (two feathers per fly)
- Crosscut rabbit strips (brown, gray or black)
That’s it, honestly. I’ve substituted the saddle hackle in for the deer hair that most patterns call for, simply because it’s easier to work with at the vise, and I’m in a bit of a rush, as the trip is quickly approaching.
Step one
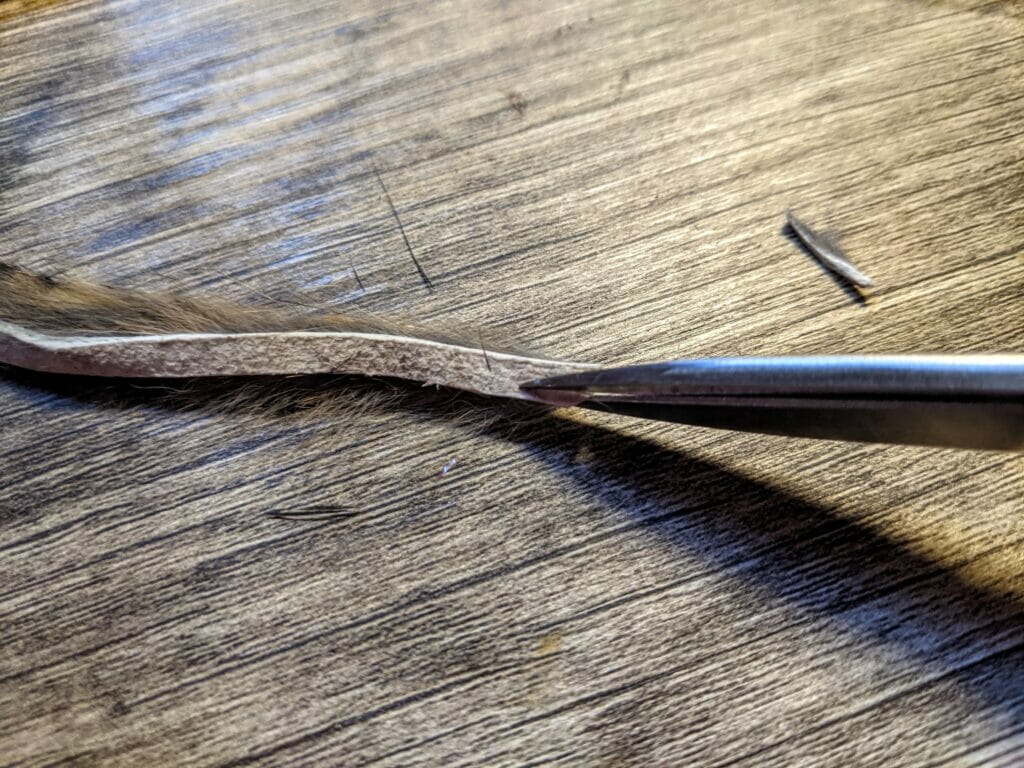
Trim a strip of crosscut rabbit right down the middle. This is for your mouse’s tail, and the strips are just a bit too wide for this use, so I opted to slice them down the middle. If you don’t have a really sharp pair of tying scissors, consider lying the tail flat, hair side down, and using an Exacto blade or a craft blade to make this cut. I have a nice pair of Loon scissors that did the trick just fine.
Step two
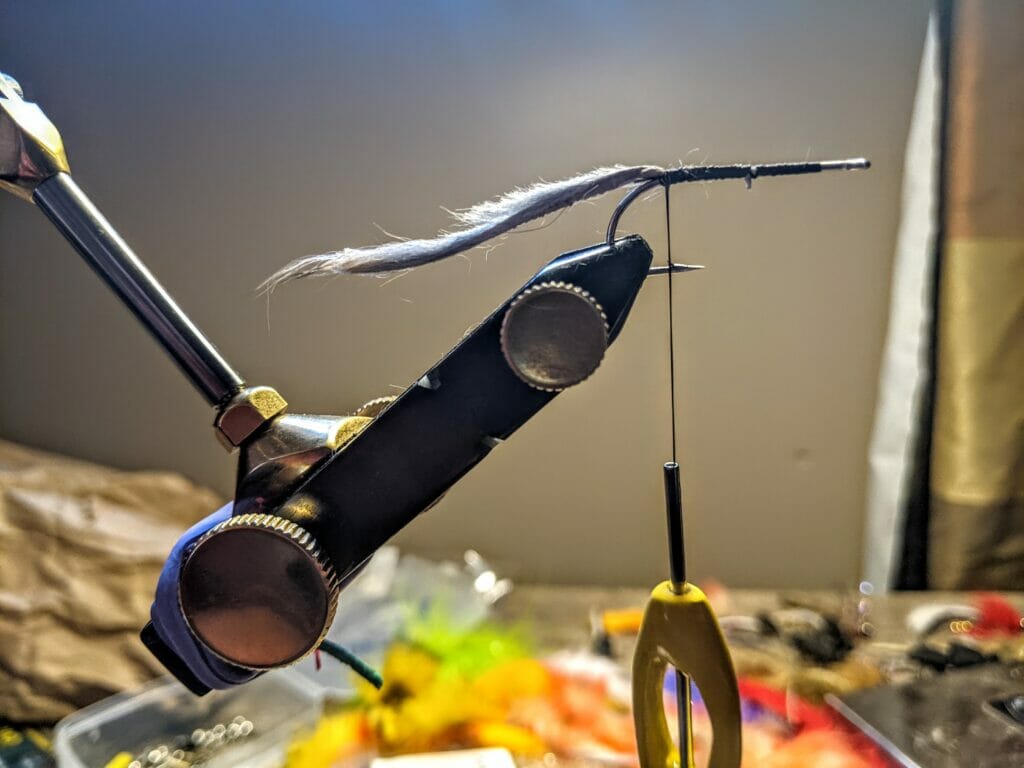
Carefully trim the fur from the sliced rabbit strip, and tie it in at the bend of the hook. Trim it to what you think is the right length for a mouse’s tail.
Steps three and four
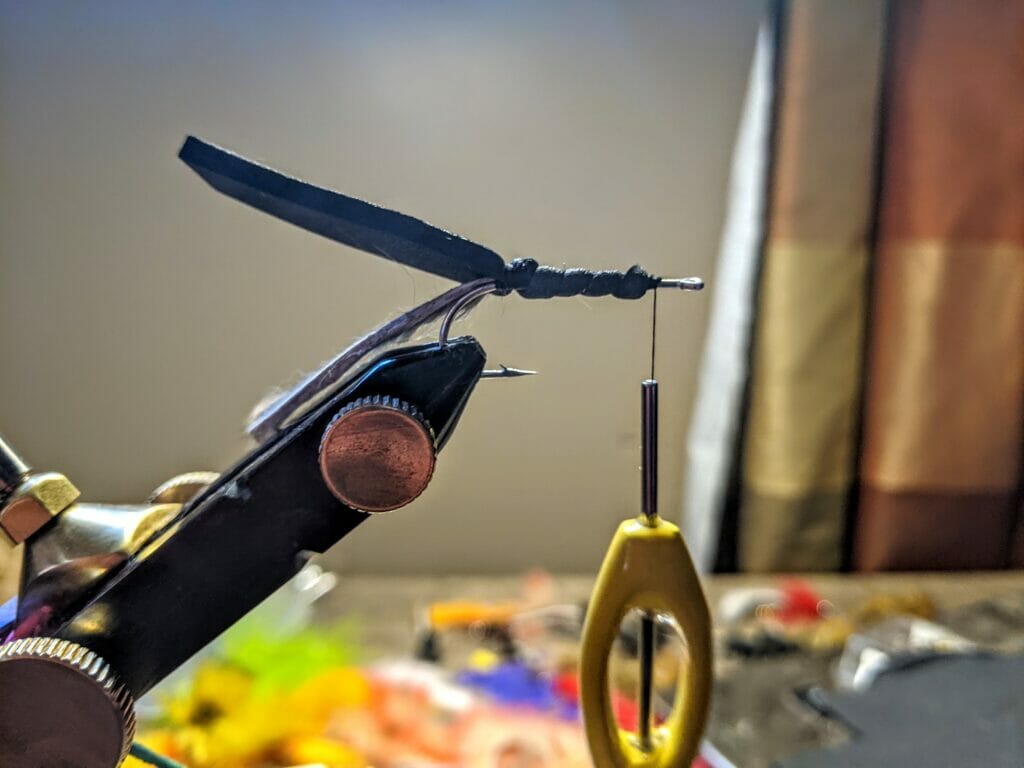
Take a strip of black craft foam about two to two-and-a-half inches long, and trim the corners of one end. Tie the skinny end over the tail at the bend in the fly, but be careful not to put much too much pressure on the foam (the tying thread will cut the foam if you tie it too tightly). The first couple of wraps should be solid, but not extreme. As you make a few more wraps, gradually increase pressure. Leave the strip of foam hanging off the bend of the hook.
Then, trim a thin, inch-long strip of black craft foam from the sheet, and tie it in over the strip of foam you just tied in. When I say thin, I mean thin — like 1/8th of an inch thick. Once it’s secured, wrap it up the hook shank and secure it at the original tie-in point with your thread. It’s not going to look too great, but you’re going to cover that foam body shortly.
Step five
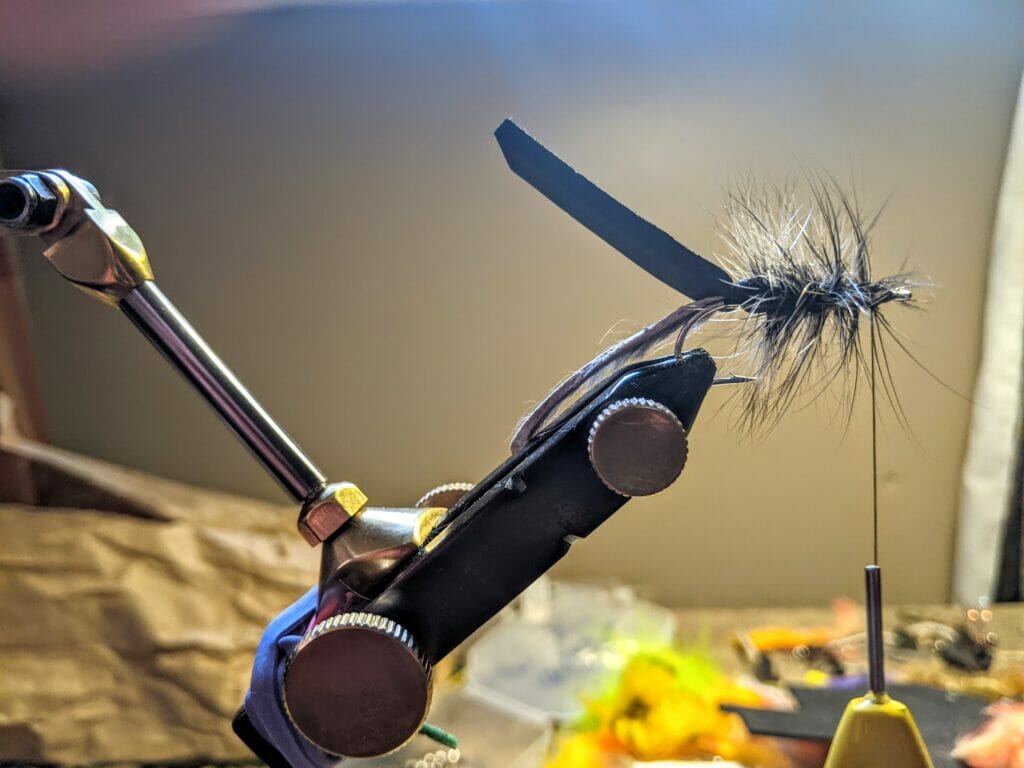
Take two strips of saddle hackle from your cape, and tie them in tip first at the tie-in point of the fly. Wrap them back to the bend in the hook, and then back to the tie-in point. The fibers will get longer as you wrap them back up the hook shank, and that’s perfectly all right. The product at this point? It looks kind of like a Woolly Bugger on a bad hair day.
Step six
Bend your hanging strip of black craft foam forward, over the splayed-out hackle. Secure it carefully below the tie-in point of the fly, again using caution—you don’t want to slice that foam this close to completion! Leave the “head” of the mouse standing up at an angle. This will give the mouse a “gurgle” or help it “skate” across the water when you’re fishing it.
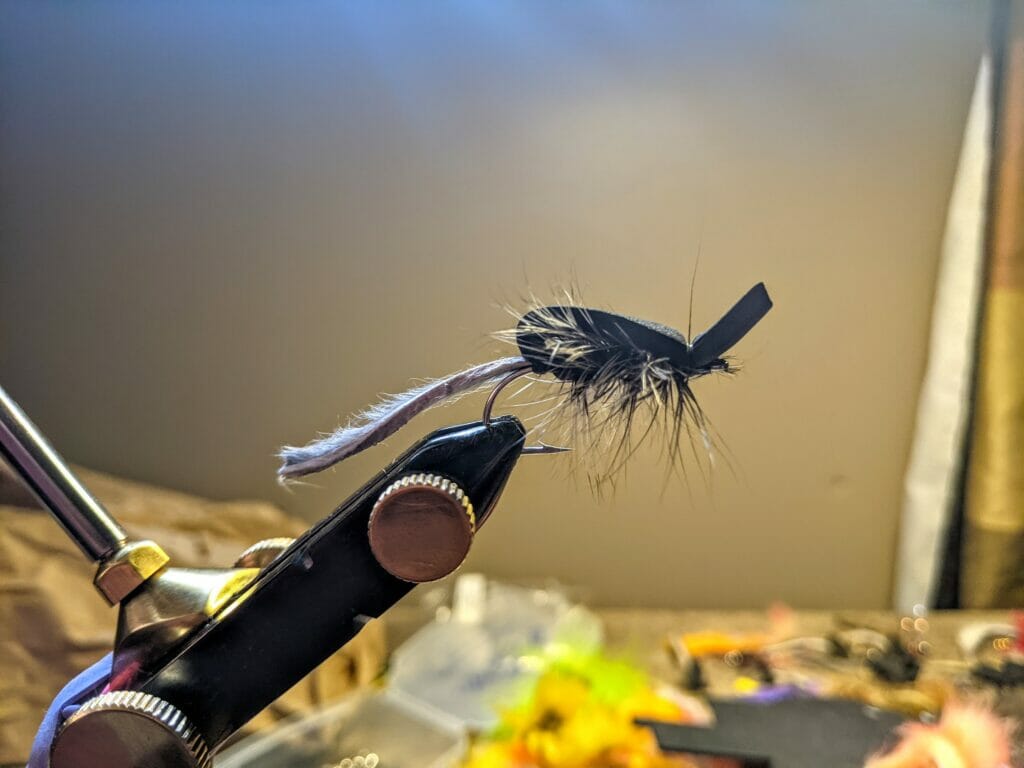
Steps seven and eight
Trim up the hackle and add a pair of eyes (if you wish). And by “trim,” I mean slice the downward-facing hackle fibers off using the bottom of the hook shank as a guide. The idea is to have the fly ride right in the surface film, and by trimming off the downward-pointing fibers, the fly should land and ride just right. I added a pair of eyes using UV-activated epoxy to secure them in place. Honestly, the fish aren’t going to see these eyes, so they certainly aren’t necessary.
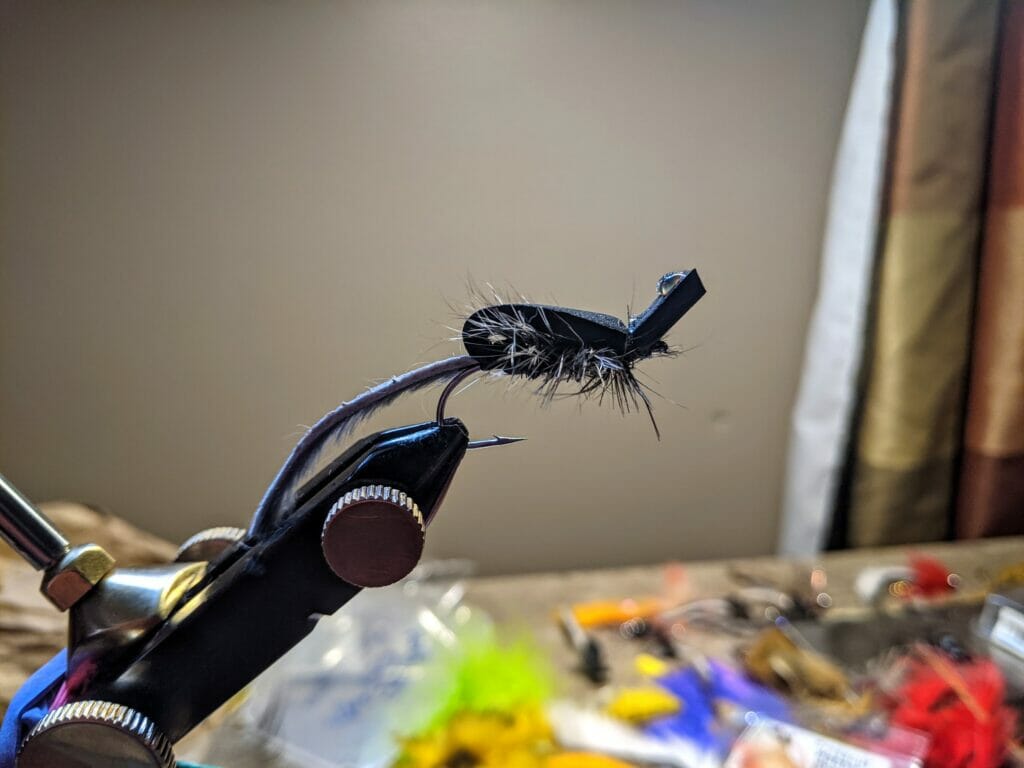
I’m guessing this pattern will ride a bit lower in the water than the “original” pattern using deer hair for the leg and body fibers. But, we adapt when we’re in a rush. I suspect it will perform just fine for Patagonia’s mouse-eating trout. I’ll report back and let you know.